
Last Updated: April 8, 2025
With Mapme, you can easily add various types and styles of markers to your interactive map.
While most markers are clickable and associated with content like text and photos, you can also add purely visual markers—referred to as visual markers or non-interactive markers.
Here are a few great use cases for visual markers:
- Indicate the mode of transportation on an itinerary (e.g., bike, car, airplane)
- Label a drawing layer with custom text
- Enhance the visual appeal with decorative icons like trees or logos
Visual Markers in Action
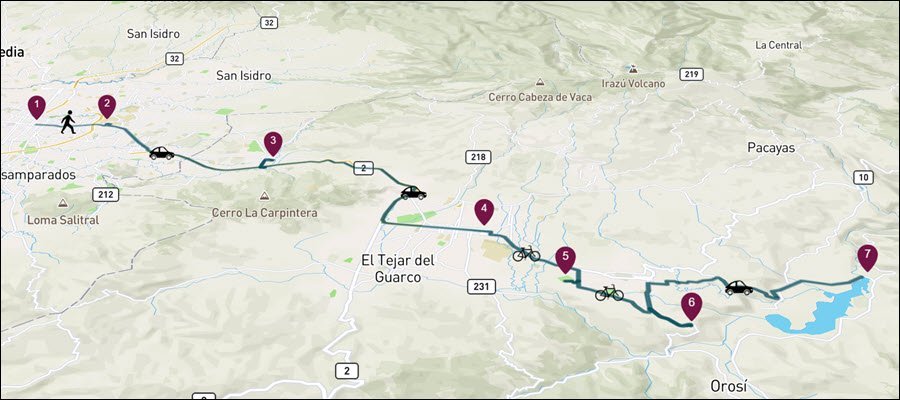
Interactive Itineraries
Use visual markers such as cars, bikes, or buses to clearly represent transportation modes in your interactive tours or itineraries.
Choose from our extensive icon library or upload your own!
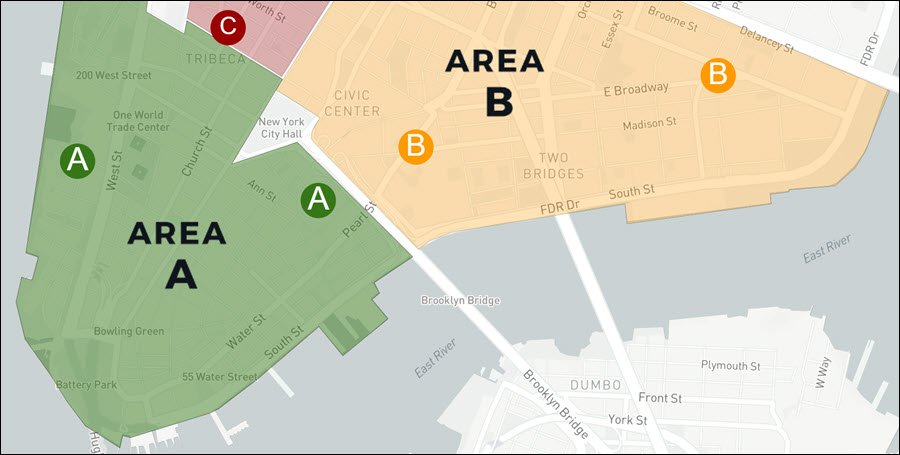
Real Estate Maps
Make your real estate maps more intuitive and engaging.
Use visual markers to highlight neighborhoods, emphasize key points of interest, showcase branding, and more.
Check out this example.
Types of Visual Markers
- Individual Visual Markers: Unique markers used to label specific map locations with icons, numbers, or text.
- Category Visual Markers: Reusable icons applied across multiple locations, ideal for uniform visual representation (e.g., trees, parking spots, or bikes).
How to Create Individual Visual Markers
1. Create a Category
Create a new category to group your visual markers (e.g., name it “Visual Markers”).
Set the category visibility in the legend to NO under:
Category and Markers Visibility > Show Category in Legend.
2. Add a Marker Location
Add a location where the visual marker should appear. Use the drop pin option if you don’t have an exact address.
Assign the location to the “Visual Markers” category.
3. Customize the Marker
In the Marker Customization section, select New Design. Then:
- Choose an icon from our gallery
- Upload your own image
- Add a text label
To add a text label:
- Set shape to Floating
- Set content type to Text
4. Convert to a Non-Interactive Marker
In the marker’s settings, go to Marker and Content Display and turn Override Category Settings to ON. Then, set the following:
- Content Display: Off
- Show Label: Off
- Show Halo: Off
The marker will now appear on the map without being clickable.
How to Create Category Visual Markers
1. Create a Category
Set up a category for your marker group (e.g., “Parking Lots”).
2. Customize the Marker
In the Marker Customization section, choose your preferred design method:
- Select an icon from our gallery
- Upload your own image
- Add a text label
- Add a serial number
3. Remove Interactivity
In Category and Marker Display, set the following:
- Show Category in Legend: NO
- Content Display: Off
- Show Label: Off
- Show Halo: Off
4. Add Locations
Go to the Locations menu and add locations to this category. Each will share the same visual marker.
Customizable visual markers are just one of the many tools Mapme offers to help you create maps that are both beautiful and informative.
Best of all, everything is designed to be intuitive for map creators.
Ready to build your own?