

Overview
This guide explains how to manage and update map data using Helper Sheets in Google Sheets.
This workflow is ideal when your data requires cleaning, formatting, or combining from multiple sources before being sent to your map.
If your data is already managed in a CRM or collected via forms, you may want to explore other options to connect data to your map.
How It Works
Use one or more Helper Sheets to store and process your raw data. Then use Google Sheets formulas (such as ARRAYFORMULA) to populate the Map to Sheets sheet.
All updates are managed in the Helper Sheets. When ready, click Send to Map to update your map.
This workflow is one-way: Google Sheets → Map
Typical Data Flow
- Import or copy/paste data into a Helper Sheet
- Clean, format, and structure the data in Google Sheets
- Use formulas to populate the Map to Sheets sheet
- Send the formatted data to Mapme
- Publish your updated map
Important: Google Sheets should remain your single source of truth.
Changes made directly in the Mapme editor will be overwritten the next time you send data from Google Sheets.
Visual Data Flow
This diagram illustrates how data moves from your source into your map using Helper Sheets:
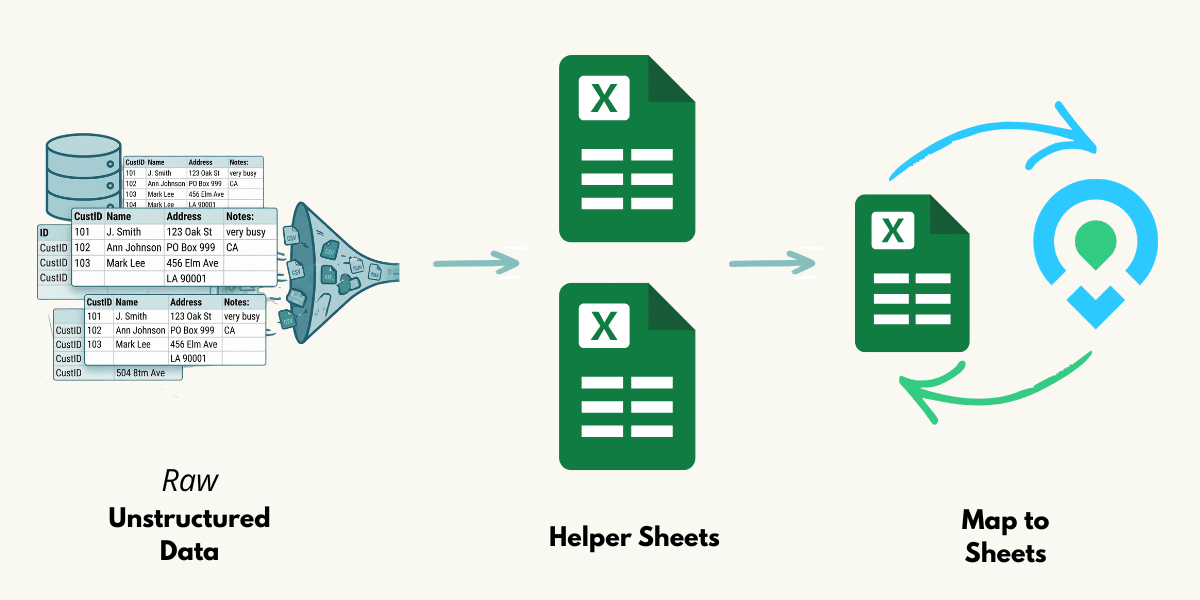
- Data Source: CRM, forms, or external datasets
- Helper Sheets: Store raw data and apply transformations
- Map to Sheets: Structured sheet formatted for Mapme
- Map: Final interactive visualization
This approach gives you full control over how your data is cleaned, structured, and displayed before publishing.
Helper Sheets vs. Data Integration Workflow
In this Helper Sheets workflow, you manually control and transform your data inside Google Sheets.
In contrast, the Data Integration workflow automatically syncs data from external tools (like CRMs or forms) into Google Sheets.
- Helper Sheets: Google Sheets is the source of truth. You manage and edit the data.
- Data Integration: External system (CRM, forms) is the source of truth. Data should not be edited in Sheets or Mapme.
Implementation Guide
1. Create Your Map
Start by creating a new map or opening an existing one.
If your map uses categories (e.g. “Hotels”, “Restaurants”), set them up in the Mapme Editor before connecting your data.
2. Install the Map to Sheets Add-On
Install the add-on from the Google Workspace Marketplace and follow the setup guide.
Important: For the Data Management use case, if you have multiple Google accounts, make sure you are using your default Google account. To check, click your Google profile icon in the top-right corner. Your default account is listed first and labeled “default”.
3. Configure Map to Sheets
- Open the Map to Sheets sidebar
- Click Use Case Configuration
- Select Data Management
- Click Save
4. Add Data to Helper Sheets
Create one or more Helper Sheets and import or paste your data. You can combine data from multiple sources into a single structured dataset.
5. Process Data with Formulas
Use ARRAYFORMULA and other Google Sheets functions to transform your data into the format required by Map to Sheets.
Formulas must be added in row 3. Here are some examples:
=ARRAYFORMULA(Helper-Sheets!A1:C)Copy values from multiple columns
=ARRAYFORMULA(Helper-Sheets!D1:D & " " & Helper-Sheets!E1:E & ", " & Helper-Sheets!F1:F)Concatenate address fields
=ARRAYFORMULA(IF(Helper-Sheets!C4:C="", "", 17))Set a fixed zoom level
=ARRAYFORMULA(IF(ISBLANK(Helper-Sheets!G1:G),,"embed;url:" & Helper-Sheets!G1:G))Embed media from a URL
You can also apply conditional logic, format HTML content, or use functions like ENCODEURL for advanced use cases.
6. Test and Send Data
Review your formulas, click Send to Map, and verify that your locations display correctly.
Why Use Helper Sheets?
- Flexible data transformation using Google Sheets formulas
- Combine data from multiple sources into one workflow
- Maintain full control over your dataset
- Scale to large datasets (thousands of locations)
Processing Limits
Map to Sheets processes up to 10,000 new or updated rows per request. If your dataset exceeds this limit, simply click Send to Map again until all rows have been processed.
Tip: For large datasets, you may need to repeat this step multiple times to complete the update.
Related Guides
- Connect Your Data to an Interactive Map – Overview of all data connection options
- Connect Any Application to Your Map Using Google Sheets – Automate data from CRMs and external tools
- Map to Sheets Setup Guide – Step-by-step installation and configuration
- Update Your Map from Google Sheets – Benefits and real-world use cases
Need Help?
Visit our Support Center or contact us.